How to use GitHub with Visual Source Code (Win10)
I use Visual Studio Code (VSC) to create my website. I also save my work to my GitHub account. This requires integrating VSC to my GitHub account. A problem occurred when I set up Two-Factor Authentication (2FA) on my GitHub account. I couldn’t directly push to my repo. GitHub would require 2FA which would prompt a dialog to appear when VSC attempted to connect to my account. This post is to have ready access to instructions for integrating VSC with GitHub.
Assumptions
These instructions assume you want to integrate your work in Visual Source Code with your GitHub account. This allows you to work locally in a familiar work environment then create repositories (repos) on your GitHub account to save your work to a repo. You can also create branches for specific changes to your work within VSC.
It also assumes you have an Authenticator app installed on your mobile phone, you have VSC installed and you have a GitHub account.
Basic steps
-
Set up Two-factor authentication (2FA) in GitHub.
-
Creating a personal Access Token in GitHub to use in place of a password in a Git CLI.
-
Authenticate in VSC to a GitHub Repository.
Setting up two-factor authentication (2FA) on your GitHub account
-
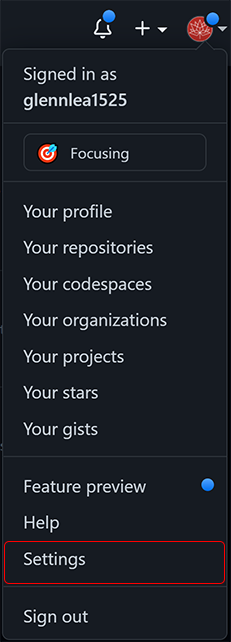
After you have signed in to your GitHub account, select Settings from your profile dropdown menu.
-
From the sidebar, click Account security. On this page you change your account password, enable Two-factor authentication and view a list of devices that have logged into your account. For this task we are interested in enabling 2FA.
-
If 2FA is not enabled already, click Enable two-factor authentication.
-
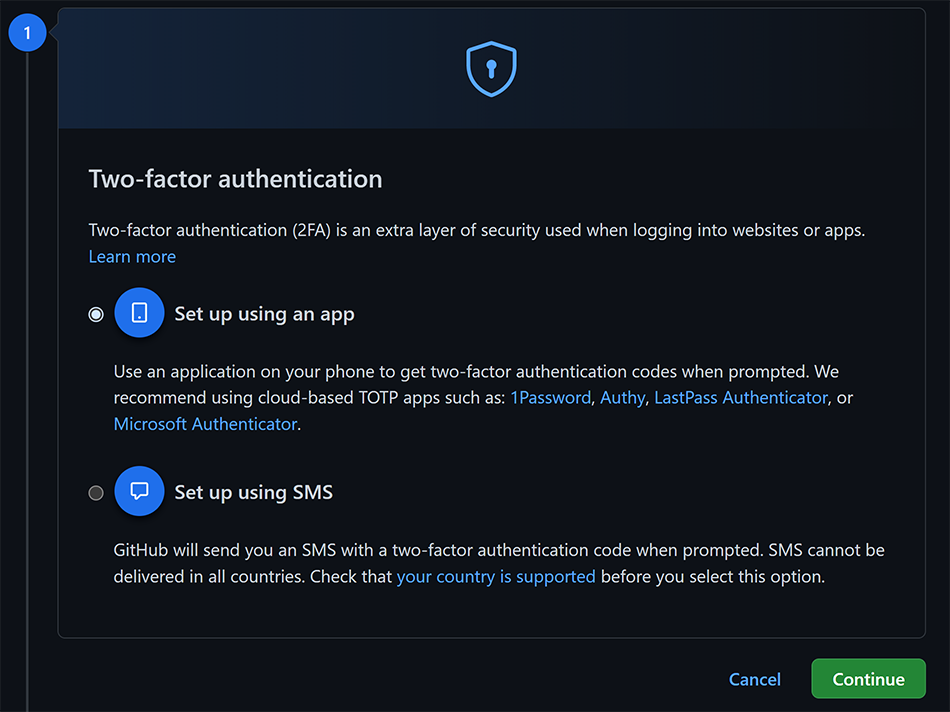
A list of two-factor methods appears including Authenticator app. Select Set up using an app and click Continue.
-
On the page that appears, under the first step select Set up using an app, then click Continue.
-
Under Authentication verification scan the QR code using a TOTP (Time-based One-Time password) authenticator on your phone such as iPassword, Microsoft Authenticator, Google Authenticator or Authy.
-
Enter the six-digit code from the TOTP authenticator app in the field under the QR code, then click Continue.
-
You are then provided with a set of recovery codes. Click Download to save your recover codes to a safe place such as a cloud service. Print them out to have a backup copy. These recovery codes allow you to access your account if you have forgotten your password or other access problems.
-
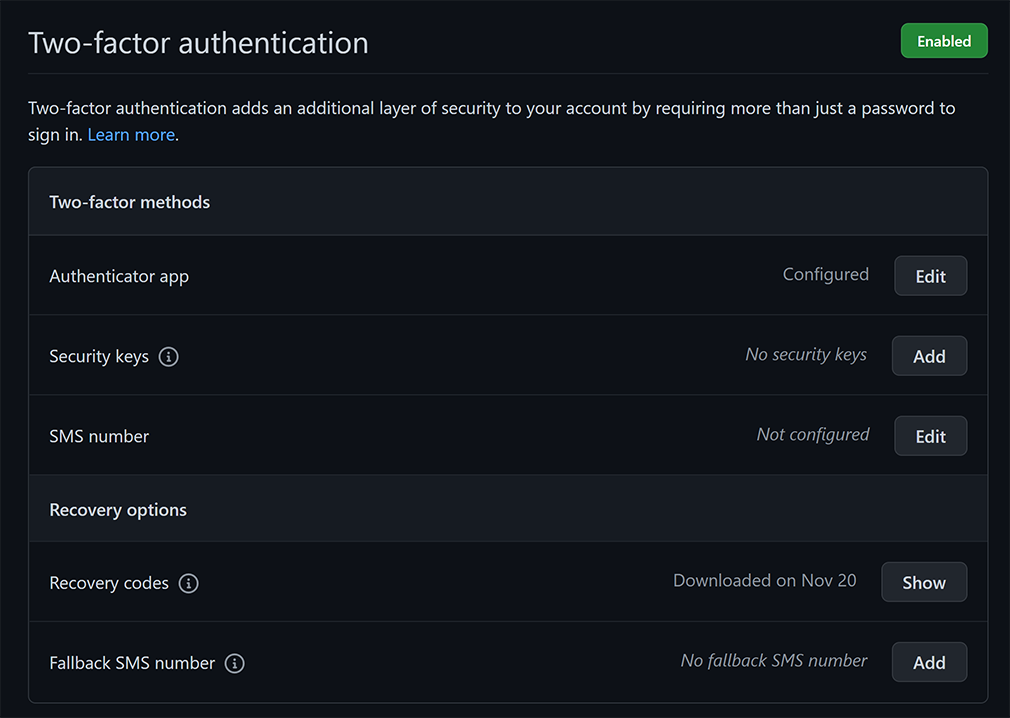
Click I have saved my recover codes to enable 2FA for the account. 2FA is now enabled.
-
Sign out of your account and sign-in again. You can then open your TOTP app and enter the six-digit code to gain access to your account.
Generate a Personal Access Token (PAT)
Next, you need to create a Personal Access Token to authenticate your account through VSC. This token is created in the GitHub account.
-
Log in to your GitHub account and from the profile menu, click Settings.
-
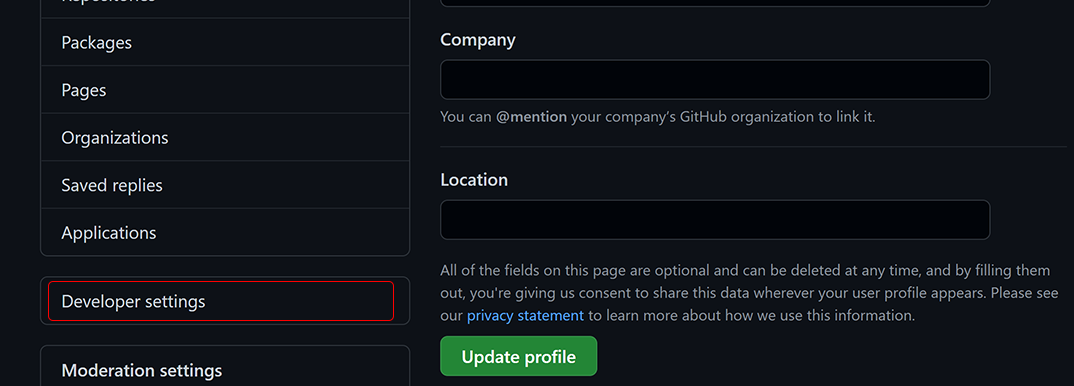
From the sidebar, click Developer Settings. (Private details removed in the image, of course.)
-
Under Developer settings, click Personal access tokens. (Private details removed in the image, of course.)

-
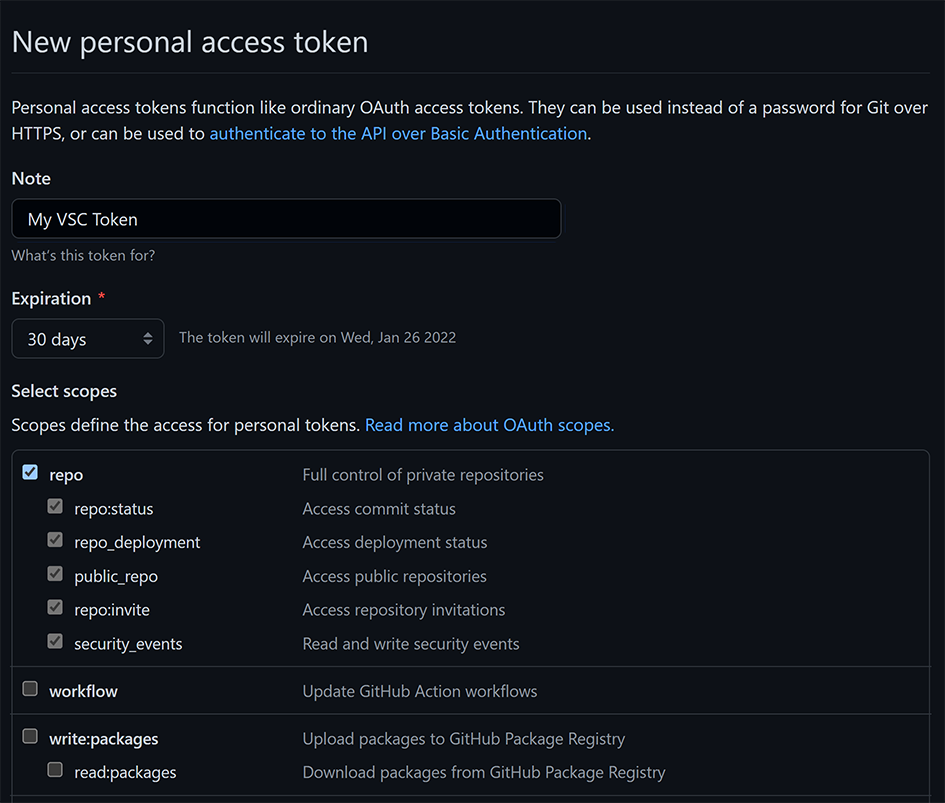
Click Generate new token. The New personal access token page appears.
-
In the New personal access token page, do the following:
-
Enter a descriptive name.
-
Set an expiration for the token.
-
Click repo to give full control of private repositories. You can safely ignore all other options.
-
-
Click Generate token.
-
GitHub now generates a new token and displays it. Copy the token and save it to a safe place as you would any password such as to a password keeper.
Authenticating VSC with a GitHub repository
Any time you interact with a repository on GitHub from VSC, authentication is required. The Personal Access Token (PAT)) you created can then be used to manually authenticate VSC to GitHub. Afterwards, this is done automatically until the PAT expires.
-
In VSC install the GitHub Pull Requests and Issues extension. See GitHub Pull Requests and Issue for details.
-
Sign in to GitHub in a browser and return to VSC code.
-
Assuming Git for Windows is installed (to download it, see git for windows), use the integrated git CLI in VSC (open with Ctrl+Shift+) to store your username/password in a secure, encrypted Windows Credential Store. Run the following command to store your GitHub credentials:
git config --global credential.helper wincred -
Confirm the credentials were stored by opening Windows Credentials using:
Start > “Credentials” > Credentials Manager
-
A GitHub Login dialog appears. Enter the following information in this dialog:
-
In the Id field, enter your GitHub account Id.
-
In the Password field, enter your Personal Access Token which you copied and saved.
-
-
In VSC you can now clone a repository using the Git: Clone command in the Command Palette (Ctrl+Shift+P) or the Clone Repository button in Source Control view.
-
GitHub requires authentication to complete the cloning of the repo. If GitHub did not automatically authenticate, then the GitHub Login dialog appears. Enter the information you provided previously (GitHub account Id and PAT).
-
If required, you can create a new branch using the following command in a VSC terminal:
git checkout <branch name> -
Make any changes to the branch as required and push your changes. If your credentials were saved correctly, VSC pushes the changes without requiring authentication.